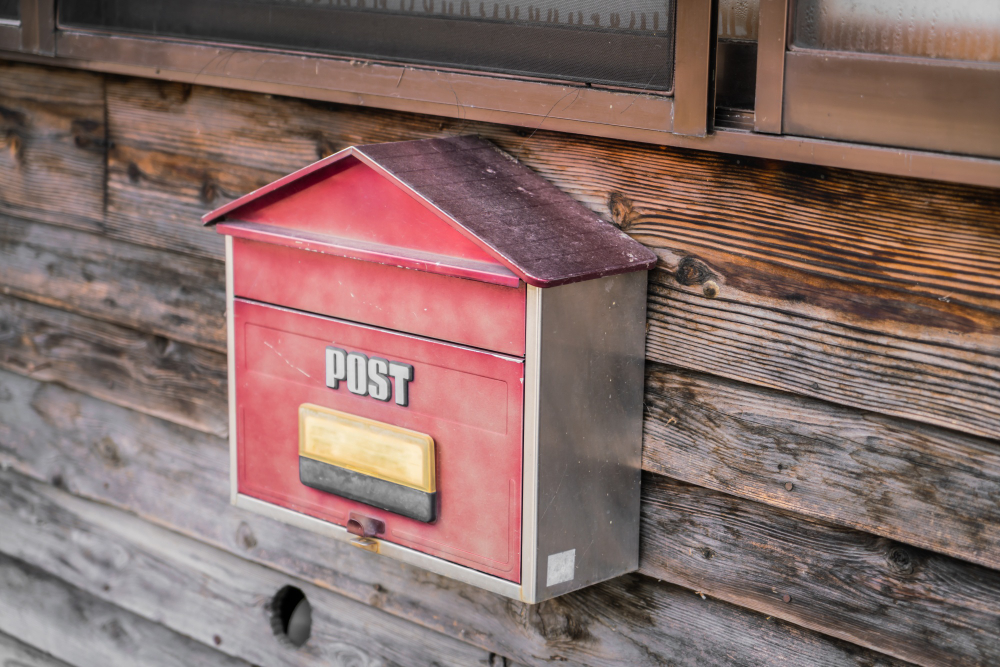
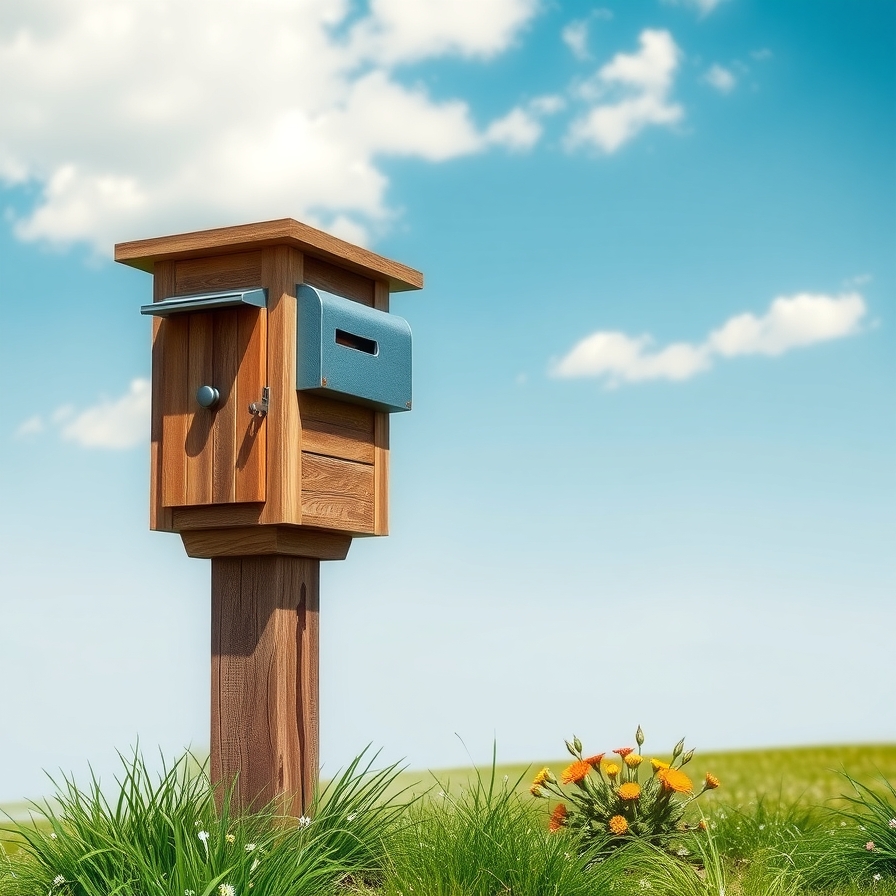
A mailbox often feels like a small detail in front of a home, yet it sets the tone for the entire curb appeal. A creative mailbox design not only makes the front yard look inviting but also reflects personality and style. A plain post and box might serve the purpose, but a customized design tells a story before guests even walk through the door. From rustic wooden builds to modern minimalist frames, there are countless ways to turn this simple structure into a standout feature.
A well-designed mailbox can also bring a touch of artistry to the neighborhood, sparking inspiration among passersby. With simple materials and a little imagination, an ordinary box can become a focal point of pride. Some designs highlight vintage charm with distressed wood or antique hardware, while others embrace bold colors and sleek finishes for a contemporary look. Functional details such as built-in planters or decorative posts make the mailbox both practical and stylish.
Exploring DIY mailbox ideas opens up endless possibilities, no matter the size of the yard or style of the home. A thoughtful design proves that even the smallest project can create a lasting impression right at the edge of the driveway.
DIY Mailbox Ideas That Add Charm to Your Curb Appeal
Your mailbox is the first thing people see at your home. It makes a first impression. A beautiful mailbox shows you care about your house. It adds personality and charm. You do not need to buy an expensive mailbox from the store. You can build your own.
Do-it-yourself projects are fun and rewarding. You save money. You get a unique mailbox that no one else has. This guide shows you ten great DIY mailbox ideas. Each idea uses different materials. Some are simple. Some need more skill. There is a project for everyone. Let us get started.
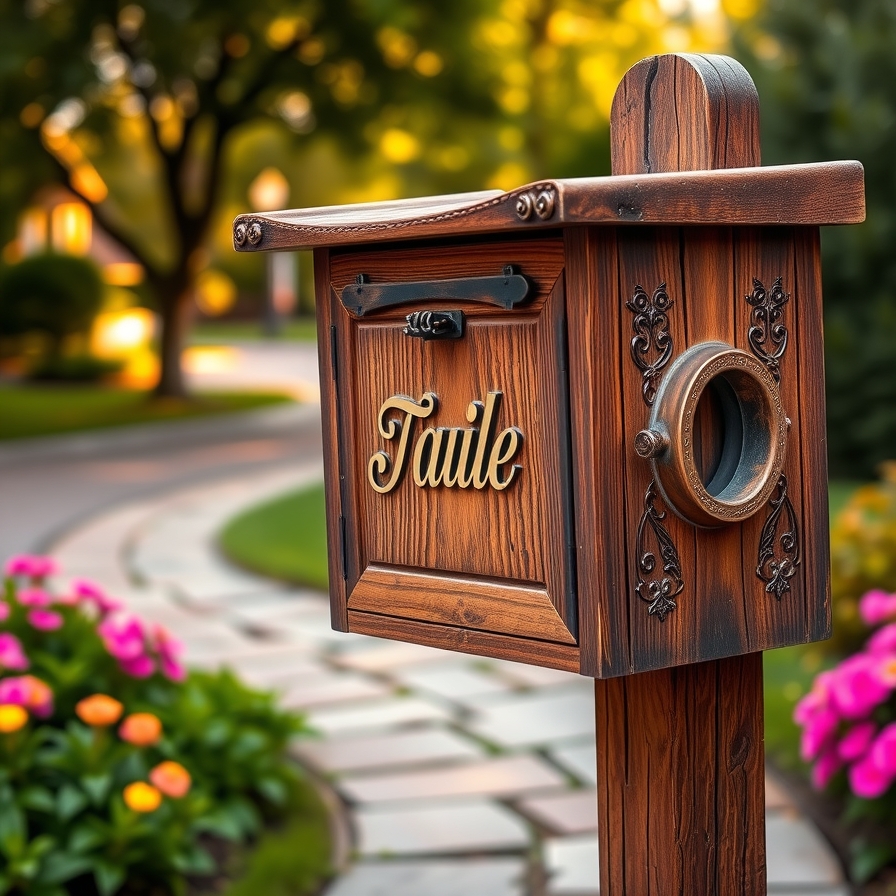
1. The Rustic Wooden Crate Mailbox
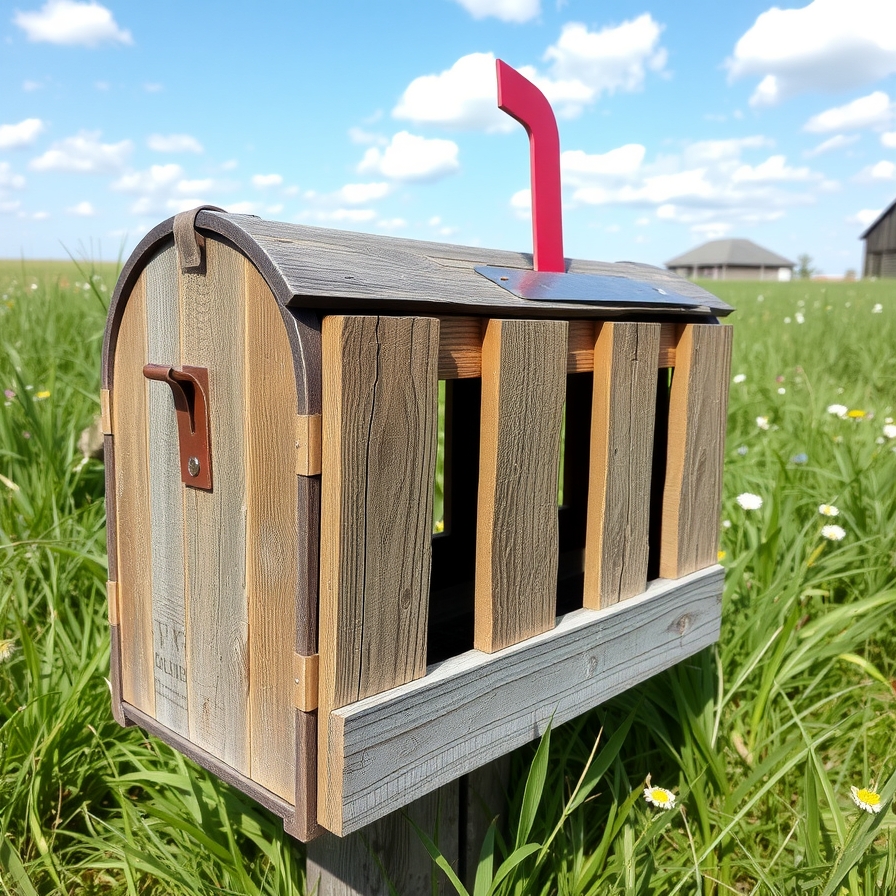
This mailbox has a warm, country feel. It looks perfect on a wooden fence post. The design is simple but very charming.
Materials You Need:
-
A standard metal mailbox (this is the inner part)
-
Wooden crate, large enough to fit the mailbox inside
-
Four pieces of wood for the frame (2x4s work well)
-
Exterior-grade wood screws
-
Waterproof wood glue
-
Exterior wood stain or paint
-
A saw
-
A drill
-
Sandpaper
Steps to Build It:
-
Measure your metal mailbox. You need to build a wooden frame that holds the crate at the right height.
-
Cut the four pieces of wood to build a simple box frame. This frame will sit on your post. The crate will rest on this frame.
-
Assemble the frame with wood screws. Make sure it is square and strong.
-
Sand the wooden crate until it is smooth. Apply your chosen stain or paint. Let it dry completely.
-
Place the frame on top of your mailbox post. Secure it with strong screws.
-
Put the metal mailbox inside the wooden crate. Then, place the crate on the frame. Secure the crate to the frame with screws from the bottom.
-
Your rustic mailbox is ready. It protects the metal box inside and looks wonderful.
2. The Upcycled Vintage Cooler
Turn an old cooler into a conversation piece. This idea is creative and fun. It gives new life to something old.
Materials You Need:
-
A vintage-style metal cooler
-
A mailbox door kit (you can buy this separately)
-
Strong hinges and a latch
-
Jigsaw with a metal-cutting blade
-
Drill
-
Exterior-grade silicone sealant
-
Spray paint for metal (if you want a new color)
Steps to Build It:
-
Clean the cooler thoroughly. Remove any old liners or insulation.
-
Decide where you want the mailbox door. The front of the cooler is usually the best spot.
-
Use the mailbox door as a template. Trace its shape onto the cooler.
-
Carefully cut out the traced shape with the jigsaw. Wear safety glasses.
-
Attach the mailbox door to the cooler using the hinges. Make sure it opens and closes smoothly.
-
Install the latch to keep the door secure.
-
Apply silicone sealant around the inside edges of the door. This makes it waterproof.
-
You can leave the cooler as is for a vintage look. Or spray paint it a bright, new color.
-
Mount the cooler on a sturdy post. Your unique mailbox is complete.
3. The Modern Cedar Planter Box Mailbox
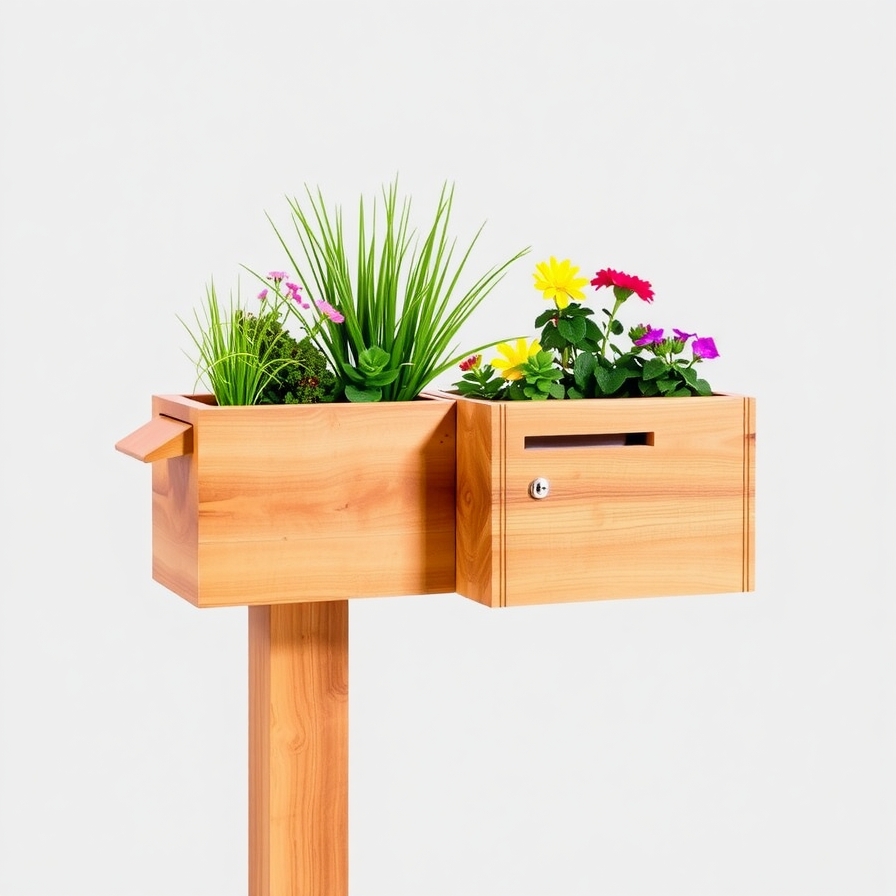
Combine your love for gardening with your mailbox. This design has a built-in planter. You can fill it with beautiful flowers.
Materials You Need:
-
Cedar boards (cedar is good for outdoors)
-
A standard metal mailbox
-
Wood screws
-
Waterproof liner for the planter (a plastic tub works)
-
Drill
-
Saw
-
Exterior wood sealant
-
Soil and plants
Steps to Build It:
-
Design a box that will hold the mailbox on one side. The other side will be a planter box.
-
Cut the cedar boards to size. You need pieces for the bottom, sides, and back.
-
Assemble the main box. Leave one section open for the planter.
-
Cut a hole in the top of the box for the mailbox to slide into.
-
Insert the waterproof liner into the planter section. This protects the wood from soil and water.
-
Apply a coat of wood sealant to the entire box. This helps it last longer in the weather.
-
Slide the metal mailbox into its slot.
-
Fill the planter with soil and your favorite flowers or small plants.
-
Mount the entire unit on a strong, treated wood post.
4. The Simple Painted Brick Mailbox
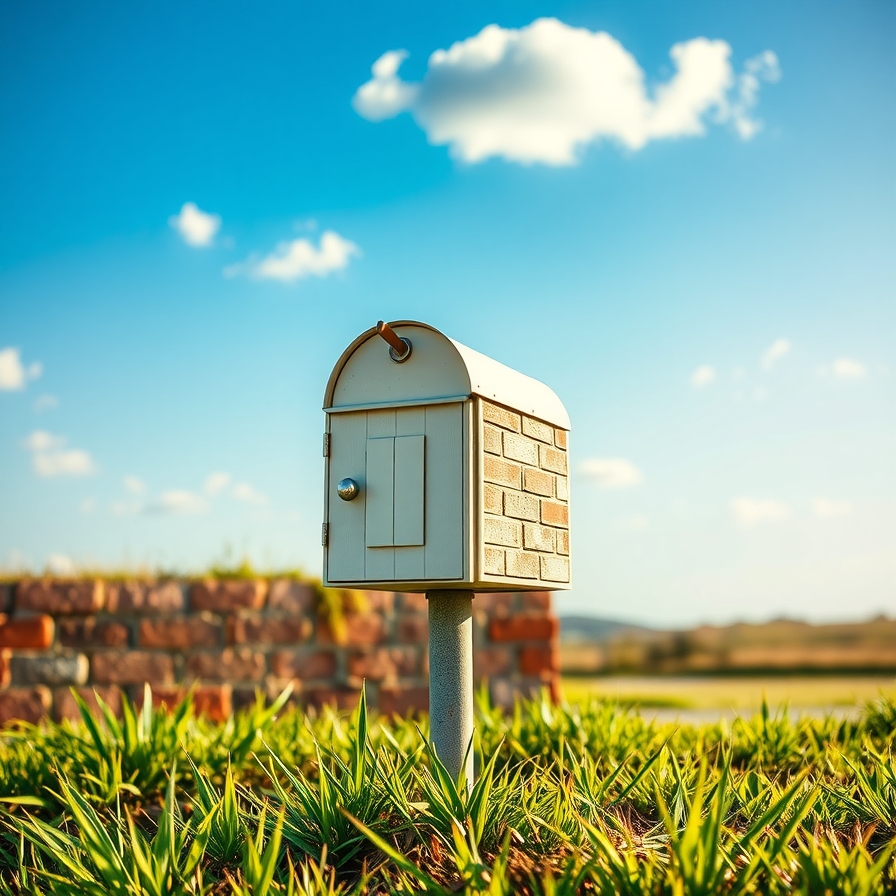
A brick mailbox looks solid and permanent. It is a classic choice. You can build one around a standard mailbox.
Materials You Need:
-
Bricks (about 50-70 for a standard size)
-
Mortar mix
-
A standard mailbox
-
A concrete foundation (a pre-poured slab is easiest)
-
A trowel
-
A level
-
A bucket for mixing mortar
Steps to Build It:
-
Start with a solid, level concrete slab. This is your foundation.
-
Lay the first layer of bricks in a square shape on the slab. Use mortar to hold them together. Check for level constantly.
-
Continue building up the brick walls. Leave an opening in the front for the mailbox.
-
As you build, leave a small space between the bricks and the mailbox. This is for expansion and movement.
-
Build the structure to the height you want. You can make a flat top or a slanted roof with bricks.
-
Once the mortar is dry, you can paint the bricks. White is a popular color for a clean look.
-
Slide the mailbox into the opening. Your sturdy brick mailbox will last for decades.
5. The Easy Pallet Wood Mailbox Post
Pallets are often free. You can use the wood to build a beautiful mailbox post. This project has a rustic, handmade feel.
Materials You Need:
-
Wood from a pallet (disassemble it carefully)
-
A standard mailbox
-
Wood screws
-
Sandpaper
-
Exterior wood stain
-
A post hole digger
-
Gravel and quick-setting concrete
-
Saw and drill
Steps to Build It:
-
Disassemble the pallet. Remove all the nails. Sand the wood pieces until they are smooth.
-
Decide on the design for your post. A simple four-sided box is effective.
-
Cut the pallet wood to the same length. You will attach these pieces to a central post to create a square column.
-
Assemble the wood pieces around the central post. Use screws to secure them.
-
Stain or seal the wood to protect it from rain and sun.
-
Dig a hole for the post. The hole should be about 2 feet deep.
-
Put some gravel in the bottom of the hole. Place the post in the hole. Use a level to make sure it is straight.
-
Mix the concrete and pour it into the hole. Hold the post straight until the concrete sets a bit.
-
After the concrete cures (follow the package directions), attach the mailbox to the top of the post.
6. The Colorful Mosaic Tile Mailbox
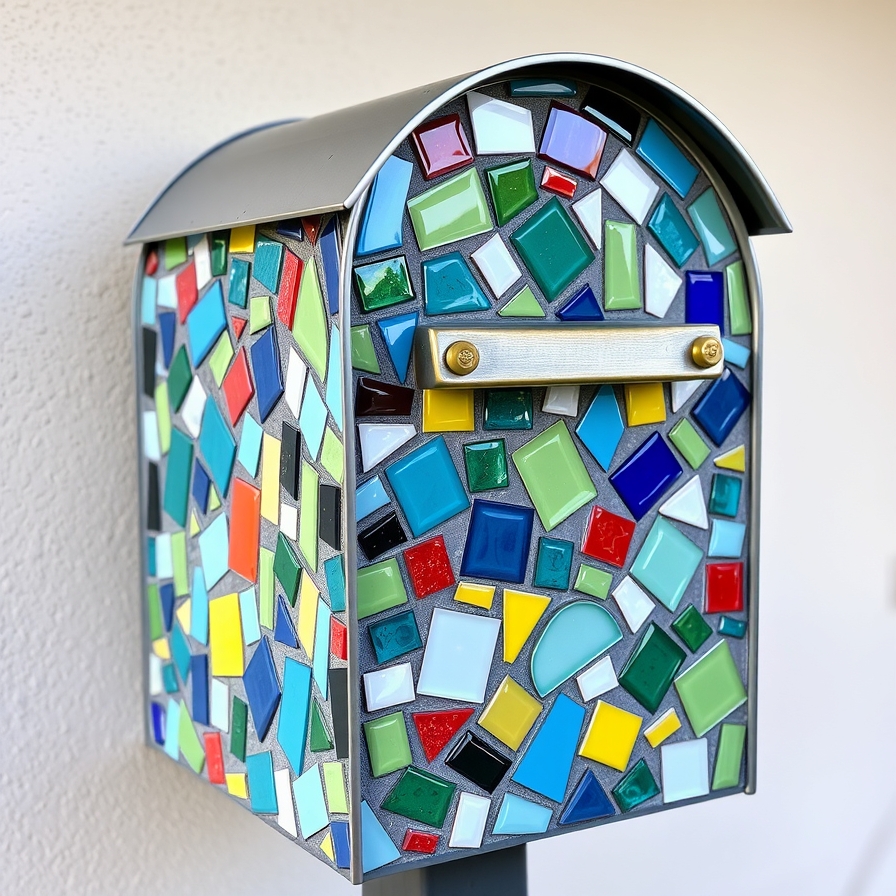
Make your mailbox a piece of art. A mosaic mailbox is bright and cheerful. It reflects your personal style.
Materials You Need:
-
A plain metal or plastic mailbox
-
Broken tiles, china, or glass gems
-
Outdoor-rated tile adhesive
-
Grout (sandeed grout is stronger)
-
A putty knife
-
Sponge and bucket of water
-
Safety glasses (for breaking tiles)
Steps to Build It:
-
Clean the mailbox surface very well. It must be free of dirt and grease.
-
Plan your design. You can draw a pattern with a pencil.
-
Break the tiles or china into small pieces. Place them in a bag and tap gently with a hammer. Wear safety glasses.
-
Apply the tile adhesive to a small section of the mailbox.
-
Press the tile pieces into the adhesive. Follow your design. Leave a small space between each piece for the grout.
-
Continue until the entire mailbox is covered. Let the adhesive dry completely.
-
Mix the grout according to the package directions. It should be like thick paste.
-
Spread the grout over the entire mosaic surface. Push it into the spaces between the tiles.
-
Wipe away the excess grout with a damp sponge. Be careful not to remove grout from the spaces.
-
Let the grout dry. Then, polish the tiles with a soft cloth. Your colorful mailbox is a masterpiece.
7. The Industrial Pipe Mailbox
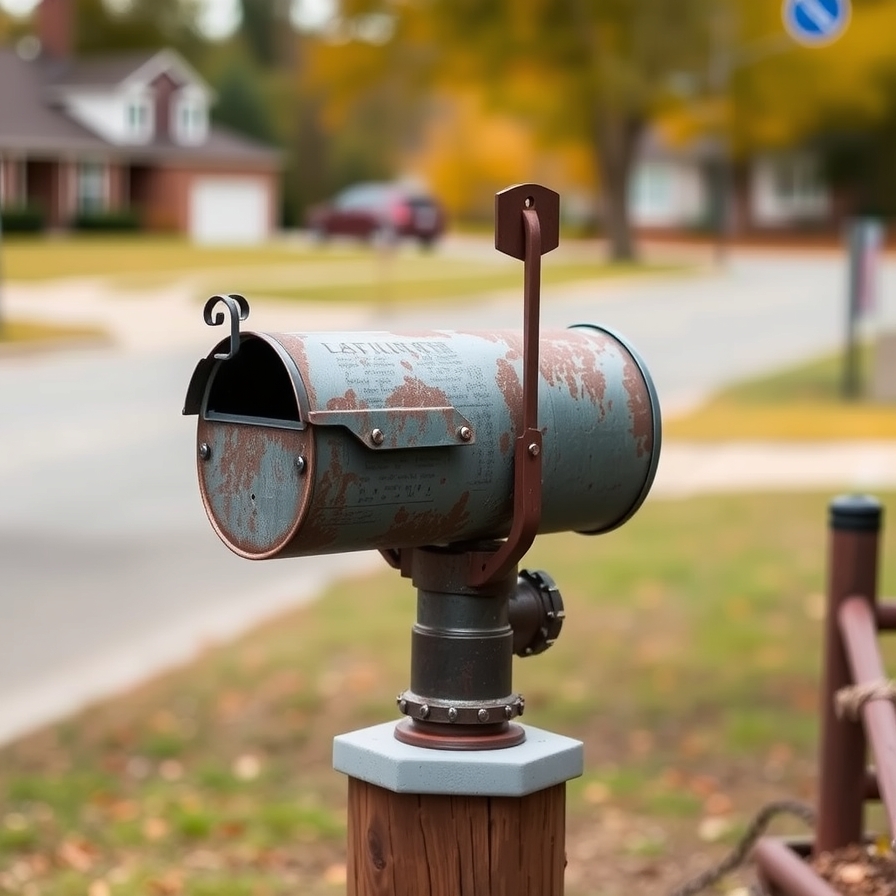
This design is modern and masculine. It uses plumbing pipes and fittings. The result is a mailbox with an urban, industrial look.
Materials You Need:
-
Galvanized iron pipes and fittings (elbows, tees, flanges)
-
A wooden board or a piece of metal for the base
-
A standard mailbox
-
Pipe thread sealant
-
Strong pipe clamps
-
Wrench
-
Drill
Steps to Build It:
-
Plan the structure. It will look like a pipe frame that holds the mailbox.
-
Assemble the pipes and fittings to create the frame. Use the wrench to tighten the joints. Apply thread sealant to prevent leaks.
-
Attach a flange to the bottom of the frame. This will be the base that connects to the post.
-
Secure the mailbox to the pipe frame using the strong pipe clamps.
-
Attach the flange to a wooden post or a concrete base. Your industrial mailbox is ready. It has a very cool, modern style.
8. The Log Cabin Style Mailbox
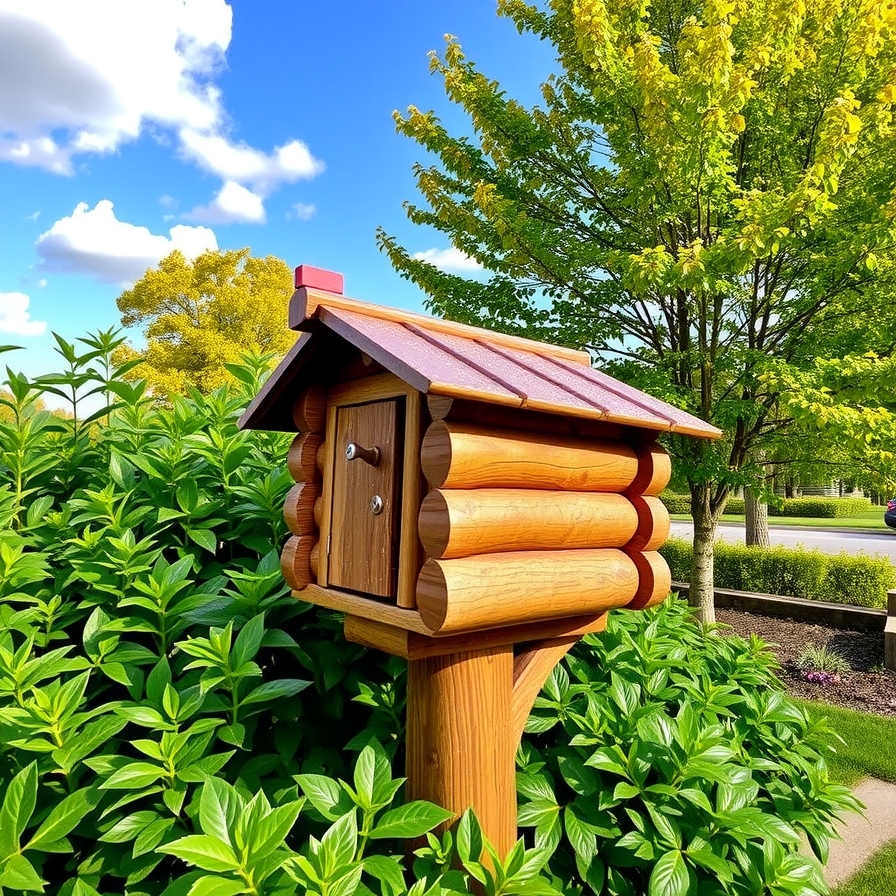
If your house has a rustic theme, this mailbox is perfect. It looks like a tiny log cabin. It is very charming.
Materials You Need:
-
Small logs or thick branches, all about the same diameter
-
A small piece of wood for the roof
-
A small metal mailbox that will fit inside
-
Wood screws
-
A saw
-
Wood sealant
-
Drill
Steps to Build It:
-
Cut the logs to the same length. These will be the walls.
-
Notch the ends of the logs. This helps them fit together at the corners, like a real log cabin.
-
Stack the logs, one on top of the other. Secure them at the corners with screws.
-
Build the walls up to the height you need.
-
Create a simple slanted roof from the piece of wood. Attach it to the top of the log walls.
-
Apply a wood sealant to protect the logs from the weather.
-
Place the small metal mailbox inside the log structure. You can secure it with a small screw.
9. The Repurposed Kitchen Utensil Mailbox
This is a quirky and fun idea. Use an old metal colander or a large pot. It shows your creative side.
Materials You Need:
-
A large metal colander, pot, or bowl
-
A mailbox door kit
-
Hinges and a latch
-
Metal-cutting jigsaw blade
-
Drill
-
Metal file
-
Spray paint (optional)
Steps to Build It:
-
Choose your utensil. A metal colander works well because it already has holes.
-
Trace the shape of the mailbox door onto the side of the colander.
-
Carefully cut out the shape with the jigsaw. File down any sharp edges.
-
Attach the mailbox door with the hinges. Install the latch.
-
You can spray paint the entire piece a fun color. Use paint made for metal.
-
Mount the colander on a post. You might need to create a simple wooden platform inside to hold the mail.
10. The Simple Stenciled Design Mailbox

You do not need to build a new mailbox. You can make your existing one special. Use stencils and paint for a custom look.
Materials You Need:
-
Your current mailbox
-
Sandpaper
-
Spray paint (a base color)
-
Stencils (you can buy them or make your own)
-
Acrylic paint in a different color
-
Paintbrushes or a stencil brush
-
Clear exterior-grade sealant spray
Steps to Build It:
-
Remove the mailbox from its post.
-
Sand the entire surface lightly. This helps the new paint stick.
-
Wipe off all the dust. Then, spray paint the mailbox with your base color. Do several light coats. Let it dry completely between coats.
-
Choose your stencil design. Tape the stencil firmly onto the mailbox.
-
Dip your brush in the second color of paint. Dab off most of the paint on a paper towel. You want a dry brush.
-
Gently dab the paint over the stencil. Do not use a brushing motion, or the paint will bleed under the stencil.
-
Carefully remove the stencil. Let the paint dry completely.
-
Apply a coat or two of clear sealant spray. This protects your design from sun and rain.
-
Reattach the mailbox to the post. It looks brand new and personalized.
Final Part
FAQs About DIY Mailboxes
How deep should a mailbox post be?
The post hole should be at least 2 feet deep. This provides good support. It prevents the mailbox from falling over in strong wind.
What are the official rules for mailbox placement?
In the United States, the USPS has rules. The mailbox should be 41 to 45 inches from the road surface. The front of the mailbox should be 6 to 8 inches back from the curb. Always check with your local post office for specific rules.
What is the best wood for an outdoor mailbox?
Cedar and redwood are excellent choices. They are naturally resistant to rot and insects. Pressure-treated pine is also a good, less expensive option.
How can I make my mailbox more secure?
Use a mailbox with a locking door. You can also install a security lock on the post itself. Make sure the post is set deep in concrete.
Can I paint a metal mailbox?
Yes. First, sand the surface to remove old paint and rust. Then, use a primer made for metal. Finally, apply exterior-grade spray paint or brush-on paint.
Conclusion
A DIY mailbox project is a rewarding weekend activity. You create something useful and beautiful. Your home gains instant curb appeal. The best part is the personal touch. A store-bought mailbox is generic. Your handmade mailbox tells a story. It shows your creativity and effort.
Choose an idea that matches your skill level. Start with a simple painted design or a pallet wood post. If you have more experience, try the brick or mosaic project. No matter which one you choose, you will have a mailbox you can be proud of. Your mail carrier will notice it. Your neighbors will admire it. So gather your tools, pick your favorite idea, and build a mailbox that welcomes you home every day.