A flawless car window can make any ride feel fresher, but stubborn tint glue often ruins that clean look. Once old tint film peels away, sticky residue clings to the glass and traps dirt, leaving a hazy, unattractive finish. This residue not only affects visibility but also makes your vehicle appear neglected. Thankfully, with the right approach, removing window tint glue becomes less of a hassle and more of a straightforward project.
Glue bonds tightly to glass, so rushing through the process rarely works. Heat, patience, and the right tools play the biggest roles in achieving a spotless result. A razor blade or scraper loosens thick layers, while common household products help dissolve leftover stickiness. Even professional detailers rely on basic methods to restore clear windows, which proves that expensive solutions are not always necessary.
Fresh air, sunlight, or a well-lit garage create the best conditions for this task. Clear visibility of every streak or smear allows you to handle trouble spots immediately. The reward for persistence is a window free of haze, ready to sparkle again. A little effort brings back the polished look your car deserves, and the satisfaction of doing it yourself feels even better.

Clear Views Ahead: Easy Ways to Remove Window Tint Glue
That old window tint looks bad. It is bubbling. It is peeling. It turns purple in the sun. You decide to remove it. You peel the tint film off. But a sticky problem remains. A layer of glue is stuck to the glass. This glue is messy and cloudy. It blocks your view.
You need to remove this glue. The job seems hard. But you can do it. With the right steps, your window will be clear again.
This glue is very strong. It is made to stick for years. You need patience. You also need the right products. This guide will show you how. We will use safe methods. We will protect your car and your health.
Safety First: Protect Yourself and Your Car
This job uses chemicals and tools. Safety is very important.
-
Work outside. Always work in a open space. A garage with the door open is good. Fresh air is best. Fumes from glue removers can be strong.
-
Wear gloves. Your skin should not touch the glue or the chemicals. Use nitrile or rubber gloves.
-
Protect your eyes. Safety glasses are a good idea. Glue can splatter.
-
Cover your car’s interior. The glue and liquid will drip. Use plastic bags or old towels. Cover the dashboard, the seats, and the door panels. Tape the covers in place. This will save you a big cleaning job later.
Gather your supplies before you start. You will not want to stop in the middle.
What You Will Need
You have two choices for methods. You can use a steam method. Or you can use a chemical method. Many people use both.
For the Steam Method:
-
A clothes steamer or a very good steam iron
-
A plastic razor blade or a old credit card
-
A spray bottle with water
-
Microfiber cloths
For the Chemical Method:
-
A high-quality adhesive remover (like Goo Gone Automotive or 3M Adhesive Remover)
-
Ammonia-free glass cleaner
-
Many clean, soft rags (old t-shirts work well)
-
Plastic razor blades
-
A spray bottle
Important: Never Use These Tools
Some tools can cause permanent damage. Avoid them.
-
Metal razor blades. These can scratch the glass. Glass scratches are forever. Use only plastic razor blades.
-
Abrasive pads. Do not use Scotch-Brite pads or steel wool. They will scratch the glass.
-
Harsh chemicals. Avoid acetone or nail polish remover. These can damage the defroster lines on your rear window. They can also harm your car’s interior.
Step 1: Prepare the Window

The glue needs help to let the remover inside. You need to break the surface. First, make the glue sticky again. Heat softens the old adhesive. Park your car in the sun for a few hours. The sun will warm the glass. This helps a lot.
If the sun is not out, use a hairdryer. Heat a small section of the window. Keep the hairdryer moving. Do not overheat one spot. The goal is to warm the glue, not burn it.
Step 2: Peel Off the Top Film (If It’s Still There)
Sometimes, pieces of tint film are still stuck. You need to remove these first. Spray the window with soapy water. Use a few drops of dish soap in a spray bottle. The soapy water helps the plastic film slide off.
Use your plastic razor blade. Start at a corner. Gently lift the edge of the film. Try to pull the film off slowly. Pull at a low angle. If the film tears, do not worry. Just work on a new section.
The goal is to remove the big pieces of plastic. The sticky glue layer will remain on the glass. That is the next problem.
Step 3: The Soapy Water and Plastic Scraper Method
This is the first method to try. It is the simplest. It works for glue that is not too stubborn.
-
Mix dish soap and warm water in a spray bottle. Make it soapy.
-
Spray the glue-covered window generously. Soak the glue.
-
Let the soapy water sit for five to ten minutes. This re-wets the old glue.
-
Take your plastic razor blade. Hold it at a 45-degree angle to the glass.
-
Scrape the glue off. Use long, smooth strokes. Wipe the glue off the scraper onto a rag often.
-
Respray the area with soapy water as you work. Keep the glue wet.
This method takes time and muscle. But it is very safe for your glass.
Step 4: The Steamer Method
A steamer is a powerful tool. The steam heats the glue and adds moisture. This breaks the bond quickly.
-
Fill your steamer with water. Let it heat up.
-
Hold the steamer nozzle a few inches from the glass.
-
Steam a small section, about one square foot.
-
Immediately use your plastic scraper. The glue should slide off easily.
-
Move to the next section. Repeat the process.
The steamer works very well. It is a fast method. But you must be careful. Do not let the steamer get too close to the glass for too long. Extreme heat is not good for the glass or the car’s window seals.
Step 5: The Adhesive Remover Method (For Stubborn Glue)
Some glue will not come off. It has been on the glass for many years. You need a stronger solution. Use a commercial adhesive remover.
-
Read the product label. Make sure it is safe for automotive glass.
-
Spray the adhesive remover on a small part of the window. Do not spray the whole window at once. The product needs to stay wet to work.
-
Let the remover sit for the time recommended on the bottle. Usually, one to two minutes.
-
You will see the glue start to dissolve. It may look bubbly.
-
Use a clean rag to wipe the area. The glue should wipe away.
-
For thick glue, use your plastic scraper after applying the remover.
Important note. Be very careful around the edges of the window. Do not let the adhesive remover drip onto the car’s paint or the door seals. It can damage them. Wipe up any drips right away.
A Special Warning About the Rear Window
The back window of your car is delicate. It has thin lines running through it. These lines are for defrosting. They melt ice and fog. You can easily damage these lines.
Be extra gentle on the rear window.
-
Never use a metal scraper.
-
Do not scrub up and down. Scrape gently along the lines, not across them.
-
Use less pressure. Let the adhesive remover do the work.
If you damage the defroster lines, you cannot fix them. The rear window would need replacement. This is very expensive.
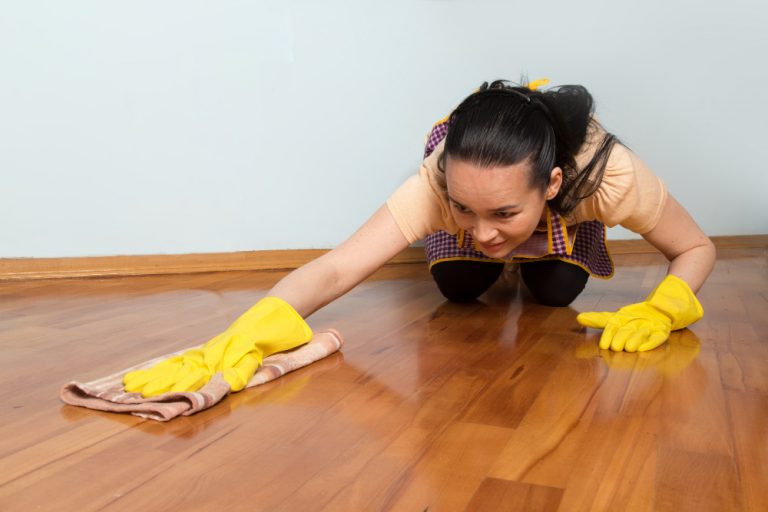
Step 6: The Final Clean Up
You scraped and wiped all the glue off. The window might feel sticky or look hazy. This is normal. You need to clean the glass completely.
-
Use a glass cleaner that has no ammonia. Ammonia can harm window tint if you install new film later.
-
Spray the glass cleaner on the entire window.
-
Wipe the window with a clean microfiber cloth. Use a clean part of the cloth for each wipe.
-
You might need to repeat this process two or three times.
-
Check your work. Look at the window from different angles in the sunlight. Make sure there is no sticky residue left.
Your window is now clean and clear. It is ready for a new tint. Or you can enjoy the clear glass.
Why Did The Glue Become So Sticky?
The glue is a pressure-sensitive adhesive. Sunlight and heat break it down over time. The chemicals in the glue deteriorate. This causes the bubbling and the purple color. The glue loses its strength but becomes a sticky mess.
When to Call a Professional
This job is doable. But it is also messy and takes time. You might want to hire a professional.
Consider professional help if:
-
You are not comfortable working with chemicals.
-
You are worried about damaging the rear window defroster.
-
The glue is extremely hard and will not come off.
-
You have a very large vehicle with many windows.
An auto tint shop does this every day. They have professional-grade products and tools. They can finish the job quickly. The cost may be worth it for your peace of mind.
A Clean Start
Removing window tint glue is a project. It requires patience. But the result is worth it. A clear window looks much better. It is safer for driving.
Remember the key steps. Protect your car. Use plastic tools. Start with simple soapy water. Move to steam or adhesive remover for tough spots. Be especially careful with the rear window. Take your time. Follow these steps. You will succeed. Your car windows will be spotless and clear again.