The best DIY closet storage ideas use shelves, bins, hanging organizers, and creative dividers to save space and keep clothes neat. Simple projects like adding hooks, baskets, and stackable boxes can transform any messy closet into an organized, easy-to-use space.
A messy closet can make daily life harder. Clothes get lost, shoes pile up, and finding what you need feels stressful. Many people deal with the same problem—limited space and no clear system. The good news is that with a few DIY storage tricks, you can turn even the smallest closet into a tidy, useful space. This guide will show you practical and affordable ideas that actually work. Let’s walk through each step with real examples and clever tips you can try right away.

Closet Storage Ideas DIY: 10 Smart Projects You Can Build
Does your closet feel too small? Do you have trouble finding your favorite shirt? You are not alone. Many people struggle with closet mess. The good news? You can fix it yourself. You do not need to buy a fancy closet system. With some simple do-it-yourself projects, you can create a closet that works for you.
DIY closet projects save money. They also let you design a space that fits your exact needs. You choose what to build. You decide where everything goes. This guide shows you ten easy DIY closet storage ideas. Each idea uses simple materials. The steps are clear and easy to follow. Let us make your closet organized and functional.
1. The Classic Double Hang Rod

Maximize your hanging space right away. A double hang rod is a simple solution. It instantly doubles the area for shirts, blouses, and pants. This project works perfectly for shorter items that do not need a full-length space.
Materials You Will Need:
-
Two wooden dowels (1” to 1.5” diameter) or two metal tension rods
-
Four shelf pegs (the little metal pieces that hold the shelf)
-
A tape measure
-
A pencil
-
A drill
Step-by-Step Guide:
-
Empty your closet. Clear out all your clothes. This gives you room to work.
-
Find the right height. Measure the length of your shorter clothes. Shirts usually need about 40 inches of space. Leave a few extra inches for the hanger.
-
Mark the spots. Use your pencil to mark where the shelf pegs will go. You need two marks on each side wall of the closet. The marks should be level with each other.
-
Install the shelf pegs. Drill small pilot holes where you made your marks. Gently screw the shelf pegs into the walls. Make sure they are straight and secure.
-
Place the rod. Rest your wooden dowel on the four shelf pegs. That is it. For a tension rod, simply twist it into place between the two walls.
Now you have two levels for hanging clothes. This creates much more space.
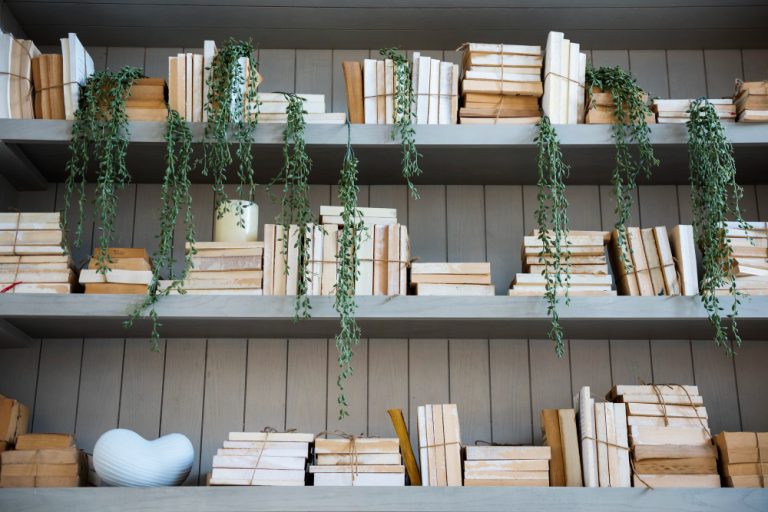
2. Simple Shelving with Crates

Wooden crates are versatile building blocks. They have a cool, rustic look. You can stack them and arrange them in many ways. This idea is great for sweaters, shoes, or bags.
Materials You Will Need:
-
Several wooden crates (all the same size works best)
-
Wood screws
-
A screwdriver or drill
-
A level
Step-by-Step Guide:
-
Plan your layout. Arrange the crates on the floor first. Try different patterns. You can stack them sideways or upright.
-
Attach the crates together. Once you like the layout, screw the crates together from the inside. This makes the structure strong and stable.
-
Secure the unit. For safety, attach the entire unit to the wall. Find the wall studs. Use screws to connect the back of the crates to the studs. This prevents the shelves from tipping over.
You now have custom shelves. They did not cost much money. And they look great.
3. A Hanging Jewelry Organizer

Keep your necklaces and bracelets tangle-free. This organizer hangs on the closet rod. It puts all your accessories in one easy-to-see place.
Materials You Will Need:
-
A wooden picture frame (any size)
-
A piece of wire mesh or a pegboard
-
Small hooks or knobs
-
A staple gun
-
Spray paint (optional)
Step-by-Step Guide:
-
Prepare the frame. Remove the glass and backing from the picture frame. You can paint the frame any color you like. Let it dry completely.
-
Attach the mesh. Cut your wire mesh to fit inside the frame. Use the staple gun to secure the mesh to the back of the frame.
-
Add hooks. Screw small hooks or knobs along the bottom of the frame. These will hold heavier necklaces.
-
Hang it up. Place the frame over your closet rod. The rod will hold it securely. You can also add a picture wire to the back for hanging.
Your jewelry has a new home. No more searching for matching earrings.
4. DIY Shoe Shelves from Pipes

Give your shoes a modern industrial display. PVC pipes or cardboard concrete forms are cheap. They make perfect little cubbies for each pair of shoes.
Materials You Will Need:
-
Many PVC pipes (4” or 6” diameter) or concrete form tubes
-
A saw
-
Strong wood glue or liquid nails
-
A piece of wood for the base (optional)
Step-by-Step Guide:
-
Cut the pipes. Measure the height you want for your shelves. Cut each pipe to that same length. You need a lot of pipes for a full shelf unit.
-
Glue the pipes together. Arrange the pipes on a flat surface. Glue them together at the points where they touch. Let the glue dry for a full day.
-
Make it stable. For extra strength, glue the entire group of pipes to a wooden base. This creates a solid unit.
This organizer looks very stylish. It works great on the closet floor or on a shelf.
5. The Under-Shelf Basket Trick

Use the wasted space on your shelves. The area above your folded clothes is empty. This idea uses that space for smaller items.
Materials You Will Need:
-
Wire baskets (with open tops)
-
Zip ties or small metal s-hooks
Step-by-Step Guide:
-
Choose your baskets. Find wire baskets that are the right width for your shelf. They should not be too deep.
-
Attach the baskets. Turn your existing shelf upside down. Use zip ties to connect the basket to the wires of the shelf. If your shelf is solid, use s-hooks to hang the basket from the underside.
You just created instant storage for socks, belts, or scarves. It is that easy.
6. A Belt and Tie Rack on the Door

The back of the closet door is valuable real estate. Do not let it go to waste. This project holds all your belts and ties neatly.
Materials You Will Need:
-
A towel rack or a row of small hooks
-
A screwdriver
-
A measuring tape
Step-by-Step Guide:
-
Choose your hardware. A small towel rack with multiple bars works well. So does a row of individual hooks.
-
Mark the spots. Hold the rack against the door. Make sure it does not block the door from closing. Mark where the screws will go.
-
Screw it in. Use your screwdriver to attach the rack or hooks to the door.
Now your accessories are organized and easy to grab.
7. Custom Drawer Dividers

Stop socks from getting lost in your drawer. Dividers create separate sections for everything. You can make them fit any drawer perfectly.
Materials You Will Need:
-
Foam board or thin plywood
-
A ruler and a pencil
-
A sharp utility knife
-
Strong glue or tape
Step-by-Step Guide:
-
Measure the drawer. Note the exact length, width, and depth.
-
Cut the pieces. Use your knife to cut the foam board into strips. The strips should be the same height as your drawer.
-
Assemble the grid. Create a grid pattern inside your drawer. You can make squares or rectangles. Glue or tape the pieces where they cross.
Your drawer will look neat and tidy. Everything will have its own spot.
8. A Pull-Down Rod for High Closets

Reach high shelves without a stool. This clever rod pulls down so you can easily grab your clothes. Then it goes back up out of the way.
Materials You Will Need:
-
A pull-down closet rod kit (available at hardware stores)
-
A drill
-
A screwdriver
-
A measuring tape
Step-by-Step Guide:
-
Follow the instructions. Each kit is a little different. The kit will include all the parts you need.
-
Measure carefully. You need to install the brackets at the exact same height. Use your level to make sure they are straight.
-
Attach the hardware. Screw the brackets into the wall studs. This is very important. The rod must be secure to hold the weight of clothes.
This is a fantastic upgrade. It makes use of all that high closet space.
9. A Fabric-Covered Storage Box

Hide items you do not use every day. Blankets and seasonal clothes can look messy. Pretty boxes make your closet look uniform and clean.
Materials You Will Need:
-
Plain cardboard boxes
-
Some nice fabric
-
Scissors
-
Spray adhesive or a glue stick
Step-by-Step Guide:
-
Choose your boxes. Find sturdy boxes that are all the same size.
-
Cut the fabric. Lay the fabric flat. Place the box on it and cut the fabric to wrap around the box. Leave some extra to fold over the edges.
-
Glue the fabric. Spread glue on one side of the box. Smooth the fabric onto it. Work your way around the box until it is fully covered.
Line these boxes up on your top shelf. Your closet will instantly look better.
10. A Laundry Bag Frame

Keep dirty clothes off the floor. A simple frame holds a standard laundry bag open. This makes it easy to toss clothes in.
Materials You Will Need:
-
A wire hanger
-
Pliers
-
A standard cloth laundry bag
Step-by-Step Guide:
-
Bend the hanger. Use the pliers to straighten the hanger into a large circle.
-
Create hooks. Bend the two ends of the wire into small hooks.
-
Attach the bag. Slide the open end of the laundry bag onto the wire circle. Use the hooks to hang the bag on the closet rod.
This is a quick five-minute project. It solves a common messy problem.
FAQs About DIY Closet Storage
What is the cheapest way to organize a closet?
Use items you already have. Wooden crates, cardboard boxes, and tension rods are very cheap. You can often find them at discount stores.
How do I organize my closet with no money?
Get creative. Use paper towel rolls to organize cords inside a drawer. Repurpose old jars for small items. Use the boxes from your shoes to divide a shelf.
What wood is best for closet shelves?
Pine wood is a good choice. It is strong and not too expensive. Plywood is also a great option for building shelves.
How can I make my closet look pretty?
Paint the inside of your closet a light color. This makes it feel bigger. Use matching hangers for a clean look. Add a small battery-powered light so you can see everything.
How do I organize a lot of clothes in a small closet?
Use every bit of space. Add hooks to the walls. Use the back of the door. Install a high shelf for storage boxes. Only keep clothes you actually wear.
Conclusion
A messy closet causes stress every morning. You waste time looking for things. These DIY projects offer a way out. You do not need to be an expert builder. You just need some basic tools and a little time.
Start with one project. Maybe add a double rod or some crate shelves. See how much better your closet works. Then try another idea. Each small change adds up to a big difference.
Your closet should work for you. It should make your life easier. With these simple storage ideas, you can build the organized closet of your dreams. Get started this weekend. You will feel great about your new space.
Read More: